After sharing the redesign, a few people asked about the architecture underneath. How is the CSS organized? What's the token system? How does dark mode actually work? I had a few people asking to go more in depth, so I thought I'd show it a bit more about this CSS architecture. Cascade layers, a three-tier design token system, the light-dark() migration, a modern reset, container queries, logical properties everywhere, and the progressive enhancement philosophy tying it all together.
A few weeks ago I shared the redesign of this site and how progressive enhancement played into every feature decision. That post was mostly about the fun stuff: corner-shape, view transitions, scroll-state queries, anchor positioning. The CSS “eye candy”, if you will.
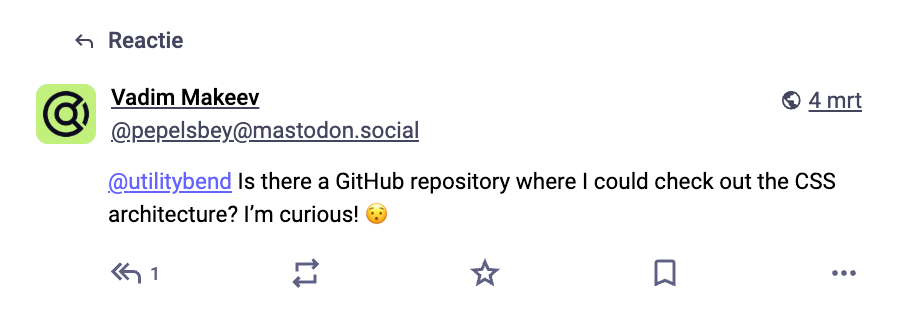
But a few people reached out and asked about what’s going on underneath. How is the CSS organized? What’s the token system? How does the dark mode actually work? These are the questions that genuinely interest me as well, so I’m happy and also a bit anxious to dig into them.
Some of these patterns might look like overkill for a personal website, and honestly, they probably are. The three-tier token system, for example, is something we use at the office for much larger projects. But this site gave me a chance to practice those ideas in a space where I can experiment freely. And who knows… maybe I’ll add a theme selection later, and then I’ll be glad the system is there.
So this is about the file structure, the naming conventions, the cascade layer strategy, the reset, and the decisions I keep going back and forth on. It’s not a tutorial and it’s not a framework. It’s just how I’ve chosen to organize things on this particular site, with opinions! (included for free). Architecture decisions come and go, and these things are so opinionated, and everybody is a ciritc 😅. So I guess I’m asking you to be gentle with me on this one.
The stack: Astro and very little JavaScript
Before diving into the CSS, a quick note on the tech underneath. The site runs on Astro, which renders every page to static HTML at build time. By default, zero JavaScript ships to the browser unless you explicitly opt in.
And I barely opt in. The entire site has exactly two React “islands”: the search component (hydrated on idle) and the comments section (client-only, since it depends on external data). Beyond that, there’s a small vanilla JS file for the cookie consent dialog and the dark mode toggle, and another one for the photo gallery’s grid layout (which I will replace by grid-lanes in the future). Most pages ship almost no JavaScript at all.
Most of it, is just HTML and CSS.
From SCSS to vanilla CSS: the layer system
I mentioned in the redesign post that I moved away from SCSS a while back. I wrote an article years ago wondering whether it was time to stop pre-processing CSS, and at this point I’m pretty confident the answer is yes. Native nesting, custom properties, color-mix(), clamp(), CSS itself covers most of what we used to need Sass for and when CSS functions have full browser support that circle is as good as complete for me.
The backbone of the architecture is cascade layers. A single @layer declaration at the top of the main stylesheet sets the priority order for the entire project:
@layer vendor, tokens, reset, atoms, molecules, organisms, pages, utilities;This one line just sets the foundation of the system. It means that no matter what order the files are imported in, the cascade respects this hierarchy. Vendor styles (like Prism.js for code highlighting) are the first ones, so they’re easy to override. Tokens come next because they define the design language. The reset follows. Then components go from small to large: atoms, molecules, organisms. Page-specific styles come after that. And utilities sit on top, because that’s the point of utilities.
If you’ve ever seen Andy Bell’s CUBE CSS or Harry Roberts’ ITCSS, this will look familiar. I’m not strictly following either methodology, but the idea of organizing CSS by reach and specificity (global to local, low specificity to high) is the same. Cascade layers just defines the order rather than relying on source order tricks.
To be honest, for a project this size the layers don’t add that much value. The architecture would mostly work fine without them. But I like having them. It feels like things are in order, call it OCD if you will, I like it. I know that if I ever need the cascade control they provide, the system is already in place. Sometimes that peace of mind is reason enough.
One decision I’m quite happy with is putting progressive enhancement features in their own dedicated files. You might be thinking… wait? isn’t that a bad practice? and the answer is… it depends. Things like corner-shapes.css and view-transitions.css contain nothing but @supports enhancements. It gives me an overview of what’s enhanced and makes it easy to remove or update features without touching core component styles. In the end, I want to move these things inside of my atoms, molecules, and so on. But it helped me to look at things from a progressive enhancement perspective. The architectures sort of portraits the redesign philosophy.
File structure and tooling
The folder structure maps directly to the layer system:
css/
├── global/          # tokens, reset, fonts, accessibility helpers (sr-only, etc.)
│   ├── primitives.css
│   ├── colors.css
│   ├── spacing.css
│   ├── typography.css
│   ├── custom-media.css
│   ├── fonts.css
│   ├── reboot.css
│   └── accessibility.css
├── atoms/           # buttons, badges, cards, links, icons...
├── molecules/       # navigation, breadcrumbs, details, forms...
├── organisms/       # header, footer, article, comments...
├── pages/           # homepage, blog, search, contact...
└── vendor/          # prism.css
The atomic design naming (atoms, molecules, organisms) comes from Brad Frost’s methodology. Some people might argue that this system is a bit outdated, but it still like working this way. It also maps well to to cascade layers because the complexity progression is natural: a button (atom) shouldn’t override a header layout (organism), and page-level overrides should win over both. Each file declares its own layer internally (e.g. @layer atoms { ... }), so the layer order in style.css remains the single source of truth.
The entry point is one file, style.css, that imports everything in the right order:
@charset "UTF-8";

@layer vendor, tokens, reset, base, atoms, molecules, organisms, pages, utilities;

@import "global/custom-media.css";
@import "global/primitives.css";
@import "global/colors.css";
@import "global/spacing.css";
@import "global/typography.css";

@import "global/fonts.css";
@import "global/reboot.css";
@import "global/accessibility.css";

@import "atoms/wrapper.css";
@import "atoms/typography.css";
/* ...atoms, molecules, organisms, pages... */

@import "vendor/prism.css";
Globals come first (tokens, fonts, reset), then components by complexity, then page-specifics, vendor last. Pretty straightforward, really… But here you might notice that I’m loading the vendors last in my main stylesheet, but the layers makes those loaded first.
PostCSS, minimal by design
The build tooling is intentionally small. Here’s the entire PostCSS config:
module.exports = {
  plugins: [
    require('postcss-custom-media'),
    require('autoprefixer'),
  ]
}
That’s it. No preprocessor, no nesting plugin (native nesting handles that), no custom selectors plugin. The CSS handles everything. Truth be told, I might be adding a few more for plugins when working on projects at work. People reading my blog usually have a browser that supports cascade layers or CSS nesting. For most cases, this is more than enough, it’s usually the second-hand iPad you gave to your kid that doesn’t support these things.
postcss-custom-media lets me define named viewport breakpoints for the remaining media queries that genuinely depend on the viewport:
@custom-media --viewport-sm (width >= 576px);
@custom-media --viewport-md (width >= 768px);
@custom-media --viewport-lg (width >= 1024px);
@custom-media --viewport-xl (width >= 1200px);
@custom-media --viewport-2xl (width >= 1400px);
@custom-media is a native CSS feature that lets you define named media queries. Unfortunatly it isn’t supported anywhere except for Firefox Nightly behind a falg. I know Adam Argyle has been advocating for this feature for quite some time. It sure would be nice to have it.
And autoprefixer is mostly a safety net at this point. It’s really only doing work for -webkit-font-smoothing and ::-webkit-scrollbar pseudo-elements. Could probably remove it eventually, but it’s not hurting anything.
Design tokens: three tiers of custom properties
The token system uses a three-tier naming convention that I’ve found works well for theming. If this looks familiar, it’s because the approach closely mirrors the three-tiered token architecture from Brad Frost and Ian Frost’s Subatomic course: Tier 1 being the raw ingredients, Tier 2 the semantic theme layer, and Tier 3 for component-specific overrides. We’ve been applying this at work and it translates well, even to a project this small:
--p-for primitives: raw values, the palette, no opinions--s-for semantic: theme-aware tokens that components actually consume--c-for component: override hooks for specific components
Primitives
These are the building blocks. Raw colors, raw spacing values, raw font stacks. They don’t know anything about light mode or dark mode:
/* Warm palette (light mode base) */
--p-color-warm-lightest: oklch(0.9771 0.0074 80.72);
--p-color-warm-darkest: oklch(0.2715 0.0094 67.42);
--p-color-warm-text: oklch(0.3914 0.015 67.37);

/* Cool palette (dark mode base) */
--p-color-cool-lightest: oklch(0.1996 0.0239 291.72);
--p-color-cool-darkest: oklch(0.9576 0.0086 67.72);
--p-color-cool-text: oklch(0.9206 0.008 73.74);

/* Brand - two variants per stop for light/dark vibrancy */
--p-color-primary-500: oklch(0.6452 0.257 331.11);
--p-color-primary-500-vivid: oklch(0.6839 0.254 330.83);
The warm/cool split is intentional. Light mode uses the warm palette (cream backgrounds, brown-tinted text), dark mode uses the cool palette (deep indigo backgrounds, light text). The “brand” colors have both a standard and a “vivid” variant because the same hue needs more saturation to read well on a dark background. In a full multi-brand project, you usually have a primitive file for each brand, of course for me, that wasn’t needed.
Semantic tokens
These are what components actually use. They map to primitives but add meaning:
--s-color-text: light-dark(var(--p-color-warm-text), var(--p-color-cool-text));
--s-surface-0: light-dark(var(--p-surface-warm-0), var(--p-surface-cool-0));
--s-color-brand-primary: light-dark(var(--p-color-primary-500), var(--p-color-primary-500-vivid));
A component never references --p-color-warm-text directly. It uses --s-color-text and trusts the token system to resolve the right value for the active theme. This is the layer where light-dark() does its thing (more on that in the next section).
One deliberate choice: I keep --s-spacing-* aliases even though they’re 1:1 copies of --p-spacing-*. A purist would say that’s redundant, and they’d be right. But the rule is simple: never use --p- directly in components. Consistency over cleverness. It means I can always find the semantic meaning of any token used in a component file without checking whether it was spacing or color that broke the convention.
Component tokens
These are the override hooks. A component defines its styling with semantic tokens as fallbacks, but wraps them in a --c- variable:
.btn {
    --btn-color: var(--c-btn-color, var(--s-color-brand-primary-dark));
    --btn-border: var(--c-btn-border, color-mix(in oklab, var(--s-surface-border), var(--s-color-brand-primary-muted) 27%));
    /* ...use --btn-color and --btn-border internally... */
}
the following pattern:
var(--c-btn-color, var(--s-color-brand-primary-dark))means: “use the component override if it’s defined, otherwise fall back to the semantic default.” This is how dark mode and contextual theming work without touching the component file. This is certainly not new… It’s covered well in Lea Verou’s article on custom properties with defaults years ago, and it scales nicely.
Dark mode with light-dark(), goodbye separate overrides
This was the biggest refactor of the entire architecture update. The old approach was a 193-line dark.css file that re-declared every semantic token under a .dark class. It worked, but it was a maintenance headache. Every time I added a new color token, I had to remember to add its dark variant in a completely separate file.
The light-dark() function (shipped in all browsers since mid-2024, great writeup from the Chrome team) lets you declare both values inline:
:root {
    --s-color-text: light-dark(
        var(--p-color-warm-text),
        var(--p-color-cool-text)
    );
    --s-surface-0: light-dark(
        var(--p-surface-warm-0),
        var(--p-surface-cool-0)
    );
    --s-color-brand-primary: light-dark(
        var(--p-color-primary-500),
        var(--p-color-primary-500-vivid)
    );
}
One token, both themes, same line. The function resolves based on the active color-scheme, not a class. So the toggle mechanism is:
html { color-scheme: light dark; }         /* follow the system */
html.light { color-scheme: light only; }   /* user forced light */
html.dark { color-scheme: dark only; }     /* user forced dark */
The JavaScript toggle sets .light or .dark on <html> and saves the preference to localStorage. If there’s no preference, color-scheme: light dark lets the OS decide. Clean, simple, and it means native form controls and scrollbars automatically adapt too. Some day I should provide the option to set it back to “auto”.
The limitation you should know about
Until we have CSS functions to open more light-dark capabilities in every browser (as this one is hard to progressively enhance), light-dark() only works with <color> values. It’s a color function, not a generic “pick one of two values” function. That means box-shadow, display, filter, opacity, blend-mode and so on can’t use it.
For those cases, I co-locate the dark overrides with the component that consumes them. For example, the grain overlay needs a different blend mode in dark mode:
.grain {
    mix-blend-mode: var(--c-grain-blend-mode, multiply);
    opacity: var(--c-grain-opacity, 0.035);
}

.dark {
    --c-grain-blend-mode: soft-light;
    --c-grain-opacity: 0.06;
}
The shadows are the exception. Since --s-shadow-subtle, --s-shadow-medium, and --s-shadow-elevated are used across 10+ components, those dark overrides live in colors.css alongside the other semantic tokens.
It’s not as clean as having everything in light-dark(), but future capabilities might make it cleaner. And the old dark.css file is gone, which is what matters.
A modern reset (but very specific)
Every CSS developer has opinions about resets. I’m no exception. There are so many good ones out there: Josh Comeau’s “My Custom CSS Reset”, Andy Bell’s “A more modern CSS reset”, Eric Meyer’s classic Reset CSS, Manuel Matuzovic’s uaplus.css, and I recently came across the one by Vale.Rocks which I really liked as well. Mine borrows ideas from several of these but is highly opinionated towards this specific project. This isn’t a “drop into every project” reset by any means, it’s tailored to how this site works and what I need from it.
Here’s the full thing:
@layer reset {
    :where(*) {
        box-sizing: border-box;
        scrollbar-color: var(--s-scrollbar-thumb) var(--s-scrollbar-track);
        scrollbar-width: thin;
    }

    :where(*::before, *::after) {
        box-sizing: inherit;
    }

    :where(html) {
        interpolate-size: allow-keywords;
        -webkit-text-size-adjust: 100%;
        text-size-adjust: 100%;
    }

    :where(body, h1, h2, h3, h4, h5, h6, p, figure, blockquote, dl, dd) {
        margin: 0;
    }

    :where(ul, ol)[role="list"] {
        list-style: none;
    }

    :where(body) {
        min-block-size: 100dvh;
        background-color: var(--s-color-bg);
        color: var(--s-color-text);
        line-height: var(--s-line-height-default);
        text-wrap: pretty;
    }

    :where(a:not([class])) {
        text-decoration-skip-ink: auto;
    }

    :where(img, picture) {
        display: block;
        inline-size: 100%;
        max-inline-size: 100%;
        block-size: auto;
        border-radius: var(--s-radius-md);
    }

    :where(video) {
        aspect-ratio: 16 / 9;
        inline-size: 100%;
        block-size: auto;
        max-inline-size: 100%;
        object-fit: contain;
    }

    :where(input, button, textarea, select) {
        font: inherit;
    }

    :where(html, body) {
        scrollbar-color: var(--s-scrollbar-thumb-root) var(--s-scrollbar-track-root);
        scrollbar-width: auto;
    }

}

@media (prefers-reduced-motion: reduce) {
    *,
    *::before,
    *::after {
        animation-duration: 0.01ms;
        animation-iteration-count: 1;
        scroll-behavior: auto;
        transition-duration: 0.01ms;
    }
}
A few things worth calling out:
Everything is wrapped in :where() for zero specificity, and I think that’s genuinely cool. It means any component style will override the reset without specificity battles, even without cascade layers. The layers already handle priority, but :where() is a nice safety net. Yes, it does limit browser support slightly, but not more than CSS nesting already does, so it’s a non-issue in practice.
interpolate-size: allow-keywords, yes, I wrote a whole post about this and it wasn’t even in my own reset until recently. Do as I say, not as I… well, it’s there now.
text-wrap: pretty on body as a default. It’s a small thing, but it makes paragraph endings look better by avoiding orphans.
The prefers-reduced-motion block lives outside the layer on purpose. You might have seen resets that nuke all animations with !important to make sure nothing overrides the user’s preference. Since this architecture uses cascade layers for everything, we get that for free: unlayered styles always beat layered styles. So the reduced-motion block sits outside @layer reset, no !important needed, and it still wins over every animation declared in any layer. That’s a nice practical benefit of having a layered architecture in place. Some don’t like the complete removal of animations, but I chose to play it safe.
Design tokens in the reset: images get border-radius: var(--s-radius-md) instead of a hardcoded 8px. Scrollbars use semantic tokens. This keeps the reset connected to the design system rather than being an island of magic numbers.
So yes… not a “real reset”, very opinionated, works for this project. But maybe there is something here that you can use for you rown reset.
The wrapper
So… I used to have a .container class for layout wrappers and I didn’t want to change HTML too much and fling everything around… so I came up with this:
When CSS container queries entered the picture, having a .container class for layout wrappers alongside container-type for query containers started feeling confusing. So the layout wrapper became .wrapper, and the word “container” now only refers to CSS container query contexts. While I was at it, I also modernized the wrapper itself:
.wrapper {
    --wrapper-max-inline-size: 1600px;
    margin-inline: max(
        clamp(var(--s-spacing-4), 5.45vw + -0.09rem, var(--s-spacing-8)),
        50% - var(--wrapper-max-inline-size) / 2
    );
}
One margin-inline declaration handles centering, max-width, and fluid gutters. The max() function picks the larger of a fluid gutter (clamped between the spacing tokens) or 50% - half the max width. On small viewports, the clamp wins and acts like padding. On wide viewports, the centering calculation takes over. Three properties collapsed into one.
It’s not the perfect end-goal here (i’d love to just remove all those extra wrapper divs, perfectly possible), but it’s a start towards modernization. So this made me a bit more ready for the following…
Container queries everywhere (well, almost)
One of the bigger changes was converting component-level media queries to container queries. The idea is simple: if a component is responding to its own available space rather than the viewport, it should use a container query.
The article preview cards are a good example. The same .article-preview component appears on the blog overview, the homepage, and the related-articles sidebar, each with wildly different available widths. This made it the perfect candidate for container queries:
.article-list {
    container-type: inline-size;
}

.article-preview {
    display: grid;
    gap: var(--s-spacing-3);

    @container (min-width: 680px) {
        grid-template-columns: 180px 1fr;
    }

    @container (min-width: 700px) {
        grid-template-columns: 280px 1fr;
    }
}
Because the layout responds to its container, the card stacks vertically in a narrow sidebar and switches to a horizontal image-plus-text layout when it has room, no matter where it’s placed.
I applied this to the footer, article previews, comments, the photo grid, rich text content (.half and .thirds image layouts), embedded iframes, and pagination navigation. If you plan on doing this yourself, Ahmad Shadeed’s container query guide is a great resource for this.
What stayed as viewport media queries: the header and primary navigation (they genuinely depend on viewport width for the mobile/desktop toggle), the table of contents sidebar (page layout concern), and the aside navigation. These are layout-level decisions, not component-level ones. The distinction matters.
Logical properties, committing to the bit
I went all in on logical properties. Every width became inline-size, every top became inset-block-start, every margin-bottom became margin-block-end. Across every CSS file in the project.
The exception policy: physical properties stay in @keyframes animation values (those are visual directions, not reading-flow), in transform and translate values, and in anchor positioning where the spec uses physical keywords.
Progressive enhancement as architecture
I covered the individual progressive enhancement features in the redesign post, so I won’t repeat all of that here. But I want to highlight how progressive enhancement is a structural decision, not just a feature-by-feature one.
The key is that enhanced features live in their own files. corner-shapes.css contains nothing but @supports (corner-shape: squircle) blocks. view-transitions.css is all @view-transition and view-transition-name declarations. If I need to remove or update these features, I touch one file, and core component styles remain untouched.
In the end I will probably move these changes inside of my atoms, molecules, and so on. But it helped me to look at things from a progressive enhancement perspective.
For some smaller features I did do these things inline, such as @starting-style, which I use for animating the <details> element:
@supports selector(::details-content) {
    ::details-content {
        block-size: 0;
        overflow: clip;
        transition:
            padding-block 0.3s,
            block-size 0.3s ease,
            content-visibility 0.3s ease allow-discrete;
    }

    @starting-style {
        details[open]::details-content {
            block-size: 0;
        }
    }
}
The @supports wrapper means browsers that don’t understand ::details-content just skip the whole block. The details element still works, it just doesn’t animate. Progressive enhancement in three lines.
This pattern repeats throughout: scroll-state queries for the sticky header, anchor positioning for the navigation pill, @property for animated gradients on buttons. Each one is gated behind @supports, each one degrades gracefully, and the architecture makes it feel natural.
Wrapping up
This isn’t perfect, and it probably never will be. It’s a side project, and I’ll keep tinkering with it. I already have a list of things I’d change if I started from scratch (Structural by removing wrappers, more smart/named grid usages, explore @scope more seriously). But that’s the nature of CSS architecture: it evolves with your understanding and time. For now I mainly wanted to to do a CSS change without changing the HTML too much, maybe I’ll do a bigger refactor some day.
If you take one thing from this, maybe it’s the three-tier token system. Or the light-dark() migration. Or just the idea that progressive enhancement can be a file structure decision, not just a code pattern. Pick whatever resonates and try it on your own project. The architecture is what makes all the other stuff possible, and getting it right is more interesting than it might sound.
I hope you enjoyed this little look behind the scenes. Maybe I should write a bit more about architecture in general, but for now, this is it.