
A few months ago, I purchased a Chromebook for my little side projects. I'm used to working on a Macbook, but I wanted to work with something that has a different feel, to make my little creations on the side feel more relaxing, and less like work. I have gained a lot of love for ChromeOS. This will be an article in two parts. In the first part, I want to talk about the first experiences, my basic ChromeOS setup and enabling developer mode.
Why did I choose a chromebook?
They are small, lightweight, and most of all affordable. You can get a Chromebook for about 350EUR that has about 8GB of RAM and a good enough processor to do some multitasking. Not being able to buy a pixelbook in Belgium, I chose to buy an ASUS Flip Chromebook.
What I was going to use the device for was quite simple: Write my articles, do some small coding projects, maintain my blog and do all of this as distraction free as possible. For me, It was important to have a Chromebook that wasn’t too heavy or big, because I knew that I wanted to code with it around the house. This also means that battery life was an important feature.

The basic things about ChromeOS that I love
Before writing about the coding process itself and how I created a basic setup, let me tell some of the things that I love about ChromeOS:
Blazing fast in starting and battery life
Yep, unless your Macbook is fresh from the shelf, this difference is really noticeable. The device literally boots in a few seconds and you’re ready to browse or create a document using the Google services. I remember installing my code tools, which took about half a day. I did all of that on battery life…
Great in organizing your workspaces
You can work full screen, barely noticing you’re running things inside of a browser. You can switch between fullscreen and windowed with the press of a dedicated button. There is also the possibility to use different desks on which you can toggle full screen with the simple short key search + [ or search + ].
Works wonderfully with my Android phone
Unlocking the screen by using my phone, using my phone network automatically when there’s no internet available. Instantly having pictures of my phone available or even sending text messages straight out of the laptop. All these little things do wonders. It’s a great experience.
Android apps
Although made for using the browser most of the time, You can easily install Android apps. My Chromebook has a screen that you can flip and use as a tablet. It’s a great addition, although not one that I use a lot.
Linux
This was probably the most important thing to start coding on it. You will have to set up the developer mode and when you do that, you can run most of the things that work on Linux. More about that later on.
Keep those updates coming Google!
Google updates are coming in a lot, and they don’t take long at all. Every little update gave a little smile to my face. It’s great to have an OS where updates feel like fun instead of delaying them because you don’t have the time for it.
The basic things about ChromeOS that take getting used to
Hard disk space
Let’s not delay this any longer and talk about the elephant in the room. ChromeOS should be used with cloud storage unless you want to take an external hard drive with you all the time. Remember I said, I’d use it for “little side projects”.
Not for gaming
Unless you use Stadia, it’s not a great device for gaming, unless you play Android games. Although Steam will get a release on ChromeOS in the future. This didn’t bother me, as this was not the purpose of my purchase.
You will need alternatives for certain programs
If you happen to be a designer that relies on Adobe software, you will be disappointed. Unless you’re happy with using creative software in the browser. Figma works just fine of course.
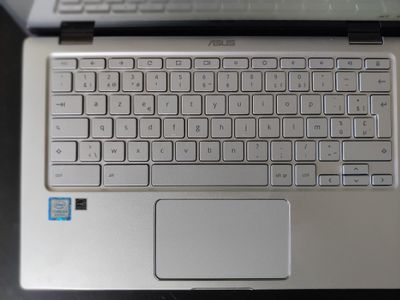
The keys take some getting used to, and maybe one is missing?
Want to use CAPS LOCK, you’ll have to press ALT+SEARCH. And you only have a ctrl and alt key on the keyboard. Which can make your coding shortcuts a bit out of touch. I think this last one was the biggest bother for me when I started out.
My basic ChromeOS setup
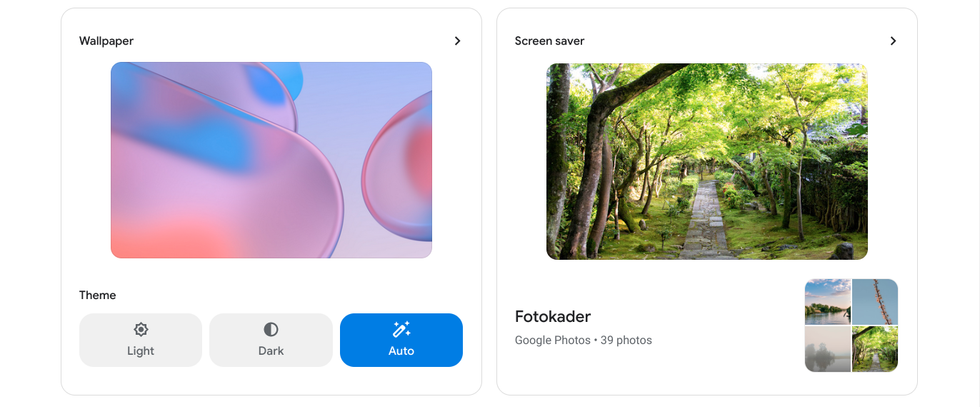
After setting up the wizard, I was pretty much good to go. By going to the personalize section in the settings, I added a background that I like (you can also upload a custom background if you want). The next thing I did was to set up my phone. This gives me direct access to my images or photos I took with my phone. You can also set up that the chromebook unlocks when you unlock your phone with smartlock, very nifty.
To start off, I didn’t add a lot of android apps. Just spotify and the twitter app I use. Fun fact: When listening to music, you get this handy little icon in your toolbar with media controls.

One thing that I like about ChromeOS is the UI. It’s all very easy to set it the way you want for basic usage, and that’s a good thing.
Next up, I added some “desks” for my workflow. I like to work full screen, especially on a laptop screen. So I pre-configured some of the desks I will be using. There is a dedicated key for this and some shortcuts to control them. Google has some good information on windows and desks.

Last thing I did after a while using it was to join the beta channel. This will add experimental features, so you might not need this, but there were some features that I wanted to try out such as the calendar pane. You can also set up experimental features by adding chrome://flags in your browser. To enter the beta channel, simply go to about ChromeOS > additional details > channel and set the channel to beta.

I won’t go over every shortcut possible with a chromebook but there are quite a few that I use regularly, for taking screenshots or partial screenshots, switching between desks. You can find a handy shortkey list on this page.
When it comes to the shelf, I personally like it at the bottom of the screen but you can switch it to the right or left if you want to.
Setting up the Linux environment
If you want to properly start coding on a ChromeOS, you’ll have to open up the developer mode.
These are the steps you’ll have to take:
- On your Chromebook, at the bottom right, select the time. Or press the search button and search for settings.
- Select
advanced > developers - Next to “Linux development environment,” select Turn On.
- Follow the on-screen instructions. You will have to allocate some space for this. I added more than the recommended because I will be coding on this, and my projects will be stored in this allocated space.
- A terminal window opens. You have a Debian 10 (Buster) environment. You can run Linux commands, install more tools using the APT package manager, and customize your shell.
In these settings you can also backup your linux environment and save it to google drive. This can be handy if you plan on experimenting a bit as I did. You can also remove the Linux environment again and everything “Linux” will be wiped clean.
Running VSCode on your Chromebook
Now that we have our linux environment running, we can easily set up VSCode. Before we install our editor, let’s run a little update, I had to do this two times, not sure why.
sudo apt-get updateNext, we need to install the gnome keyring:
sudo apt-get install -y gnome-keyringOnce we did this, all we have to do is to download VSCode from the official website.
Ensure you select the correct package for your Chromebook, to avoid falling into errors while installing it on your Chromebook.
- If your Chromebook runs on an AMD or Intel chip, select the .deb 64bit variant.
- If your Chromebook runs on an ARM64 chip, select the .deb ARM64 variant.
Not sure which version to download? You can check this by adding the following command in your terminal:
dpkg --print-architectureWhen you downloaded the installer, just open it in the downloads folder and it will install inside the Linux environment.
Quick tip: You can pin VSCode to you shelf by simply right clicking the icon when it’s open and selecting “pin to shelf”.
That’s it for part 1
This was a quick summary of the things I like about ChromeOS.
In part 2 I am going a bit more in depth by installing a node version manager, filezilla, docker, some browsers, ohmyzsh and other goodies to make things easier.