
I purchased a Chromebook for my little coding projects. In the first part I wrote about the basic development setup. In this post, we're taking a bit of a deeper dive: installing git, node, filezilla, some browsers, Docker and updating the terminal on ChromeOS. So let's open the terminal and dive right into it.
Installing Git on ChromeOS
Well, we’re actually in a linux environment here, so all you have to do is add the following command in your terminal, it’s that easy:
sudo apt install ssh gitInstalling Node - NVM
Personally, I like to use a node version manager for all my node related things. It allows you to run multiple versions of node. I have some old legacy projects that I will work on occasionally, it just makes things easier.
Node required gnup2, so let’s install this first:
sudo apt install gnupg2To install NVM, add the following command:
curl -o- https://raw.githubusercontent.com/nvm-sh/nvm/v0.39.1/install.sh | bashIf your chromebook doesn’t have curl installed, you might need to run the following command first:
sudo apt install curlWhen this is installed you can change node versions and install them. Use the following command to see your current version:
node -vYou can install another version by running the command:
nvm install [node version here]To see the full list of commands available, just type:
nvm --helpInstalling Filezilla, some browsers and alternative design tools
Filezilla
ChromeOS recently has gotten some features to make ssh connection a lot easier which I still need to take a look into. However, for most of my smaller projects (which are just some simple coding demo’s or presentations), I just need a bit of FTPing to get the job done.
For this, I like to use Filezilla, just go to your terminal and type:
sudo apt-get install filezillaBrowsers
You might want to test some things on different browsers. One thing that I miss on ChromeOS is a separate Chrome Canary desktop browser and Firefox nightly, but running the ChromeOS in beta mode does the trick for now as it allows me to check flags for container queries and all other goodies.
You can install some dev versions of browsers on the Linux platform, so here is how to install Firefox and Chromium browser:
sudo apt install firefox-esr
sudo apt install chromium
Alternatively you can access the google play store and add some mobile browsers from there. It’s great to have mobile and desktop browsers on the same device to do some testing!
Alternative design tools
There are some alternatives on Linux for your adobe software. They are not quite the same but to do some simple photo editing and making some vectors they seem to work fine. I would recommend Figma for your “real design work” though.
- Gimp as an alternative to photoshop to edit images
- Inkscape as an alternative to illustrator for vectors
- ImageMagick to do some in-terminal editing
sudo apt-get install gimp
sudo apt-get install inkscape
sudo apt-get install imagemagick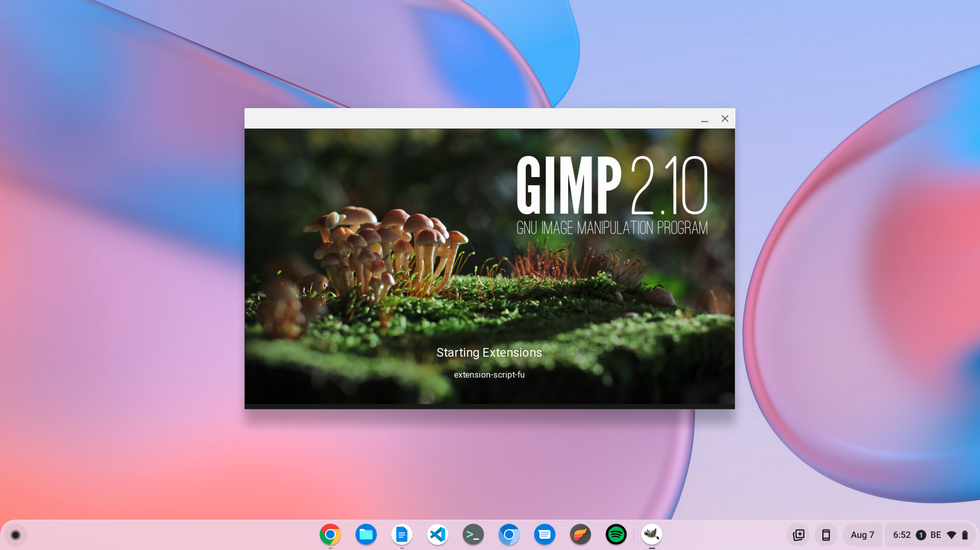
Installing Docker
It should be possible to run apache directly on Chrome. I am however not the best PHP developer and mostly rely on Docker for all things PHP. This makes a lot of these tasks a lot easier for me.
Let’s check if everything is up to date, this is just good practice:
sudo apt-get updateNext up add the following command to install the docker dependencies:
sudo apt-get install \
    ca-certificates \
    curl \
    gnupg \
    lsb-release
Then let’s add the Docker’s official GPG key:
sudo mkdir -p /etc/apt/keyringscurl -fsSL https://download.docker.com/linux/ubuntu/gpg | sudo gpg --dearmor -o /etc/apt/keyrings/docker.gpgUse the following command to set up the repository:
 echo \
  "deb [arch=$(dpkg --print-architecture) signed-by=/etc/apt/keyrings/docker.gpg] https://download.docker.com/linux/ubuntu \
  $(lsb_release -cs) stable" | sudo tee /etc/apt/sources.list.d/docker.list > /dev/null
Then we want to update the apt package index again by running:
sudo apt-get updateAnd finally install our docker engine:
sudo apt-get install docker-ce docker-ce-cli containerd.io docker-compose-pluginLet’s verify if these things worked by running the hello-world image:
sudo docker run hello-world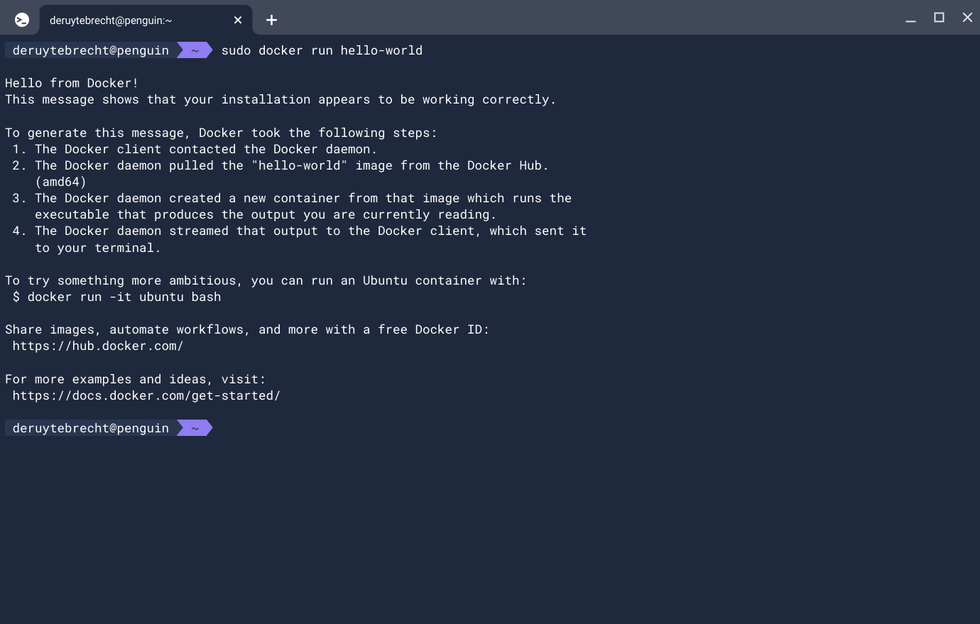
A note on Docker: Docker is quite heavy on ChromeOS and isn’t super fast in booting. However, it seemed to do everything I needed with ease. I just handle a few websites with Docker, but nothing too harsh on the machine. If you plan to do some heavy lifting with it, I would recommend buying a high-end Chromebook.
You can also install the Docker desktop app for Linux here. But it didn’t want to start on my machine. Working purely inside the terminal did work fine.
Oh my zsh
To set up zsh, we need to set a sudo password. By default Linux on Chrome OS doesn’t come with a password for sudo. This is however required to set zsh as the default shell.
sudo supasswd [your user name]You will then be prompted to set your password. Enter it, and once again to confirm.
Add the following commands to install zsh and Oh my zsh
Insert the following lines in your terminal, one by one to install Oh my zsh
sudo apt install zsh
chsh -s $(which zsh)
sudo apt install wget git
wget https://github.com/robbyrussell/oh-my-zsh/raw/master/tools/install.sh -O - | zsh
cp ~/.oh-my-zsh/templates/zshrc.zsh-template ~/.zshrc
source ~/.zshrc
And now we will edit our config file by adding the following command:
vi ~/.zshrcPersonally, i don’t like editing files that way, so if you have VScode installed, you can use the following command:
code ~/.zshrcOne of my favorite themes is agnoster, I highly recommend it. On line 10 add the following:
ZSH_THEME="agnoster"Now save and exit the file and add the following command again:
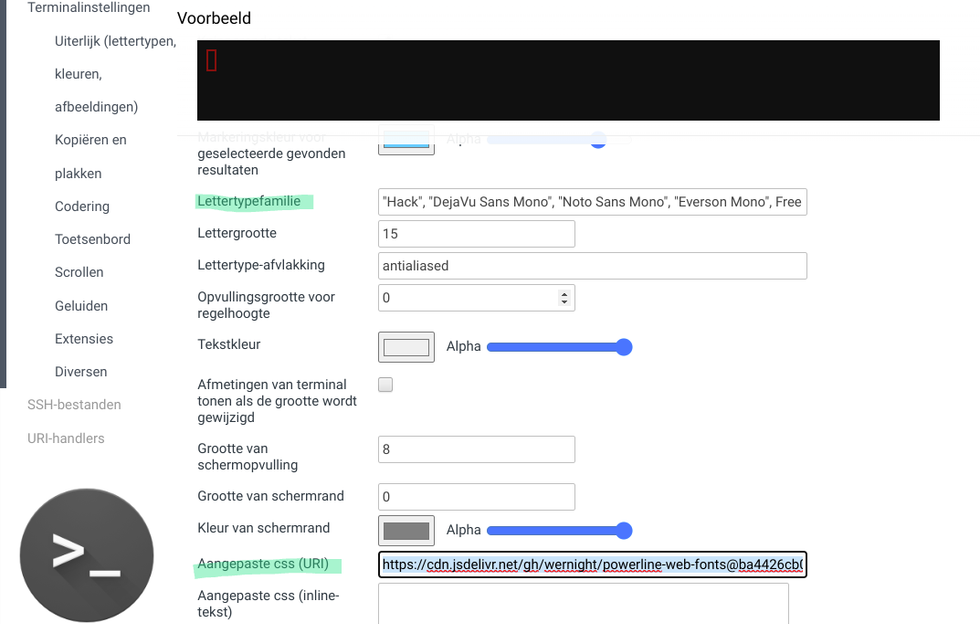
source ~/.zshrcNext, let’s update the fonts. Open up your default chrome browser and type ctrl+alt+t. This will open up a new tab with crosh, let’s change the default theme settings with ctrl+alt+p
You will get a window with theme settings.
- Enter “this url” in front of Custom CSS (URI)
- Enter “Hack” before “DejaVu Sans Mono” in front of Text Font Family like: “Hack”, “DejaVu Sans Mono”
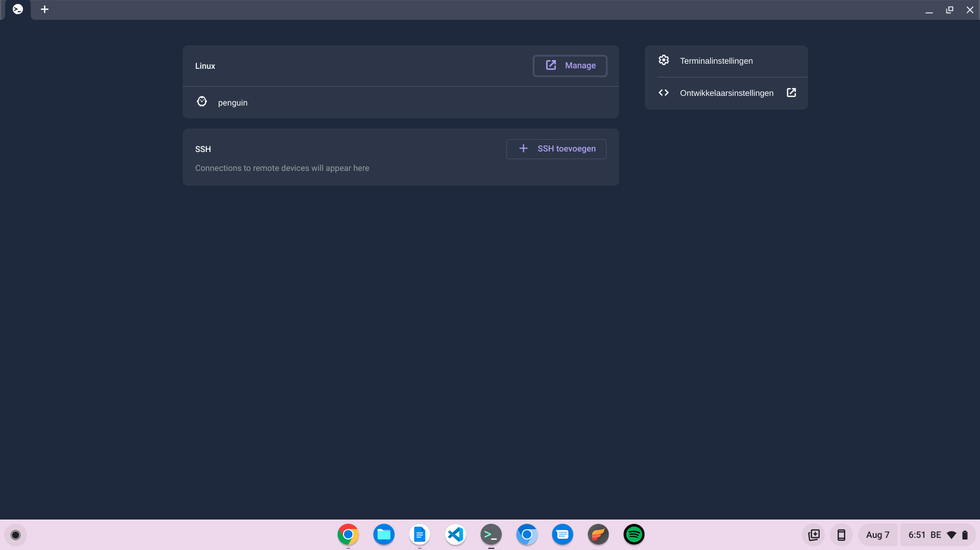
My Chromebook (screenshot) is set in Dutch, but it should give you an idea on where to find the correct fields.
And there you have it, You now have a beautiful terminal. If you’re not into the agnoster theme, there is this awesome guide for the powerlevel theme as well.
So much possibilities
As you noticed, installing things on ChromeOS is a breeze and I suggest you look around a bit, I’m sure you’ll find that perfect setup that just works. It took me a bit of time but I had a lot of fun figuring these things out. Also good to know, you can easily backup your Linux via the settings in ChromeOS in case you doubt if you’ll break something. Happy coding!